Calibrating Your 3D Printer: A Step-by-Step Guide to Perfect Prints
Calibration is the key to moving from “good” prints to truly “perfect” ones. A well-calibrated printer doesn’t just produce better prints; it saves time, reduces waste, and makes troubleshooting easier.


This guide breaks down the calibration process step-by-step, so you can get the most out of your 3D printer with each print.
Why Calibrate?
Calibrating your 3D printer ensures it functions at peak accuracy, producing smoother surfaces, stronger layers, and less warping or stringing. Proper calibration also helps align your machine’s physical settings with the slicer’s digital expectations, reducing misprints.
Fun Fact: Calibration can be the difference between creating a model you’re proud of and ending up with what looks like “abstract art.”
Essential Tools for Calibration
To get started, you’ll need a few basics:
Calipers: For accurate measurements.
Feeler Gauge or Paper: For adjusting the bed level.
Digital Thermometer: For testing extruder temperatures, especially helpful for precise work.
Calibration Test Prints: Cubes, Benchys, or other small models designed for calibration.
Step 1: Bed Leveling
The first step in calibration is leveling the bed, which ensures the first layer adheres smoothly across the print surface.
Manual Bed Leveling: Using a feeler gauge or piece of paper, move it between the nozzle and bed at each corner and the center, adjusting screws until you feel a slight drag.
Automatic Bed Leveling: If your printer has a sensor, follow the on-screen instructions. Even with auto-leveling, occasional manual checks help maintain precision.
Pro Tip: A well-leveled bed is like having a good foundation for a house - it’s where everything starts.
Step 2: Calibrate the Extruder Steps (E-Steps)
Extruder steps (E-steps) calibration controls the amount of filament pushed through the nozzle, and it’s essential for consistent layer quality and extrusion.
Measure Filament: Mark and measure 120 mm of filament from the extruder’s entry point.
Command Extrusion: Use your printer’s settings to extrude 100 mm of filament.
Measure Again: Measure the remaining filament distance to ensure 100 mm was extruded. If it’s off, adjust the E-steps per mm in your printer’s firmware.
Fun Fact: Extruder calibration can feel a bit like cooking—if the ingredients (filament) aren’t measured accurately, the end result can be disappointing.
Step 3: Set the Right Temperature
Temperature calibration ensures that your filament melts and flows correctly. Printing at the optimal temperature can reduce stringing, improve layer adhesion, and enhance surface quality.
Run a Temperature Tower: Print a temperature tower with a gradient of temperatures. Check each section for quality, stringing, and layer adhesion.
Fine-Tune Based on Filament: PLA, ABS, PETG, and other filaments all have different ideal temperatures, so run tests for each material.
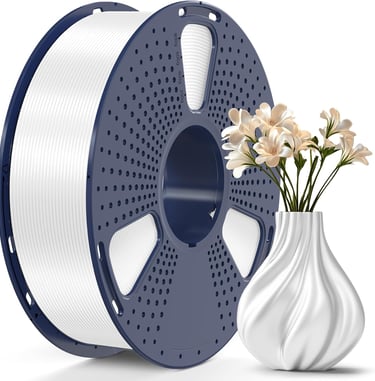
Silk PLA filament
prints beautifully but has a narrower optimal temperature range. A temperature tower test will ensure you’re getting those smooth, shiny layers.

Step 4: Calibrate Flow Rate (Extrusion Multiplier)
Flow rate controls the amount of filament extruded, affecting print accuracy and surface smoothness.
Print a Calibration Cube: Print a small cube and measure the outer walls. Compare the actual measurements to the slicer’s intended wall thickness.
Adjust the Flow Rate: Use your slicer to tweak the flow rate percentage until the measured walls match the intended dimensions.
Pro Tip: Think of flow rate like the seasoning in a recipe—too much or too little, and the whole thing can go off!
Step 5: Adjust Retraction Settings
Retraction settings impact how much filament is pulled back before the printer moves, helping to avoid stringing and oozing.
Retraction Distance: Test with small increases (starting around 2 mm) to find the sweet spot where stringing is minimized.
Retraction Speed: Test speeds between 25-45 mm/s, depending on filament type. Lower speeds suit flexible filaments, while higher speeds work for rigid materials.
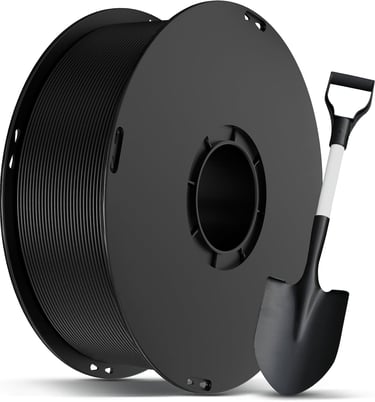
Try a Flexible TPU filament for retraction tests, as it highlights stringing issues more prominently.

Step 6: Check and Adjust Speed Settings
Speed settings influence print quality, especially for detailed or intricate models. Too fast, and you may see layer misalignment; too slow, and print times can become unnecessarily long.
Print a Speed Test Model: Look for models with various features and speeds to test both accuracy and timing.
Adjust Speeds: If details are blurred or layers misaligned, slow down your speed settings slightly until quality improves.
Fun Fact: Finding the perfect speed is like learning to pace yourself on a jog - too fast, and things can get messy!
Step 7: Fine-Tune Infill and Wall Thickness
Proper infill and wall thickness settings are crucial for structural integrity and durability. Each printer and filament type has optimal settings for achieving a balance between strength and speed.
Print Test Shapes: Try printing basic shapes (like cubes or spheres) with different wall thicknesses and infill percentages.
Analyze Structural Needs: For parts that don’t need strength, reduce infill to save time and filament. For load-bearing parts, increase wall thickness and infill density.
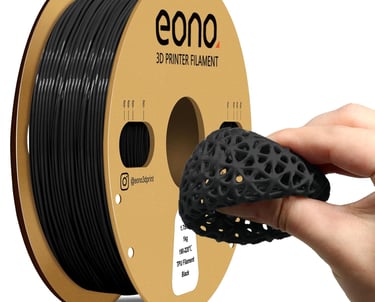
If you’re working on functional parts, try ABS filament for added strength, especially with increased wall thickness and infill.
Run Final Calibration Prints
After adjusting each parameter, a final calibration print can confirm everything is in sync. Look for any noticeable issues—layer inconsistencies, warping, or surface imperfections—and make any last tweaks.
Pro Tip: Make final tweaks to just one setting at a time. This helps isolate any potential issues and ensures each calibration step sticks.
In Summary: Perfect Prints Every Time
Calibration may take a bit of time, but it’s worth every minute for the quality it brings to your prints. By leveling the bed, calibrating extrusion, setting the right temperature, fine-tuning flow and retraction, and testing speeds and infill, you’ll see major improvements in the quality, precision, and consistency of your prints.
Fun Fact: Once you’ve mastered calibration, you’re like the “chef” of 3D printing - each setting perfectly balanced to produce deliciously detailed results!
With these steps, you’ll be well on your way to creating beautiful, high-quality prints every time. Happy printing!