3D Printing with Flexible Filaments: Tips for Successful Prints Every Time
When it comes to creating prints that need to bend, stretch, or compress, flexible filaments open a world of possibilities. From wearable gadgets and custom phone cases to soft grips and tires, flexible filaments make functional, resilient prints possible.


However, their unique properties can make them tricky to work with. Whether you’re just starting out or fine-tuning your flexible filament skills, here are some practical tips for getting the best results every time you print.
What Are Flexible Filaments, and Why Are They Different?
Flexible filaments, like TPU (Thermoplastic Polyurethane) and TPE (Thermoplastic Elastomer), are rubber-like materials that can bend and stretch. Their elasticity makes them perfect for parts that need to withstand compression or flex, unlike traditional PLA or ABS, which are more rigid.
Because of their elasticity, flexible filaments tend to be more challenging to extrude consistently. Imagine trying to push a piece of cooked spaghetti through a straw—things can get a little… “bendy!” Let’s explore how you can work around these quirks for smooth and frustration-free prints.
Pro Tip: If you’re new to flexible filaments, start with a TPU filament with a Shore hardness of 95A.
It’s still flexible, but more manageable than super-soft variants.
1. Set Your Printer Speed to a Crawl
Flexible filaments love a slower pace! Printing at a reduced speed helps keep filament feeding steady, preventing kinks or jams in the extruder.
Recommended Speed: Start around 20–30 mm/s. This may be slower than usual, but it’ll significantly reduce the chances of a failed print.
Why It Works: Slower speeds prevent the filament from bending in the extruder, which is the number one cause of “spaghetti monster” messes with flexible filaments.
2. Optimize Your Extruder for Flexibility
Printing with flexible filament is smoother with the right extruder type. There are two common setups: Bowden and direct drive. Here’s how they compare:
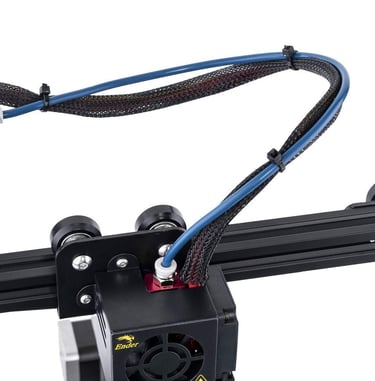
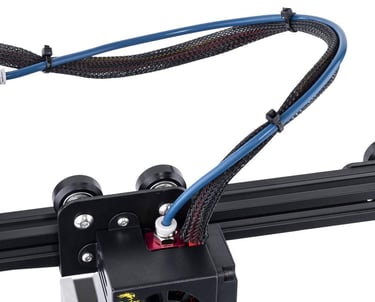
Direct Drive Extruders: Generally better for flexible filaments since the filament has a shorter path from the extruder to the nozzle. This setup minimizes the risk of filament bending or snagging.
Bowden Extruders: If you have a Bowden setup, it’s still possible to print flexible filament, but you may need to slow down even more and ensure all filament pathways are secure and as friction-free as possible.
Quick Note: Check that your extruder’s tension is adjusted appropriately.
Too much tension can squish flexible filament, causing jams; too little can lead to under-extrusion.
Recommendation
Upgrade to a high-quality filament feeder, like the Capricorn XS Bowden Tubing, which offers low resistance to help improve print quality with flexible materials.
3. Print with Lower Retraction Settings
Retraction helps prevent stringing, but with flexible filament, too much retraction can create jams or filament “curling.” Reducing retraction can make a world of difference.
Suggested Retraction Settings: Start with a retraction distance of around 1-2 mm, and a retraction speed of 10–20 mm/s. The goal is just enough to reduce stringing without pulling too hard on the flexible filament.
Alternative: Some users find that turning off retraction completely for flexible filaments prevents issues. Experiment to see what works best on your printer.
Fun Fact: Flexible filaments have a “rubbery” memory, so they often return to their original position after being pushed or pulled.
This is great for end-use functionality, but tricky in the extruder!
4. Experiment with Nozzle Temperature
Flexible filaments, especially TPU, can vary in temperature preference based on their Shore hardness. Higher temperatures increase material flow but can cause slight stringing, while lower temperatures can make the filament harder to extrude.
Starting Temperature: Most flexible filaments print well between 200-220°C. Start in the middle and adjust based on how your filament feeds.
Adjust Based on Filament Brand: Some brands have specific temperature recommendations, so it’s worth checking the packaging or product page for optimal results.
Pro Tip: Gradually adjust by 5°C up or down to find the “sweet spot” for your specific filament and printer setup.
5. Keep Your Bed Sticky, But Not Too Sticky
Flexible filaments adhere well to most surfaces, but the challenge lies in making sure they’re easy to remove without deforming or damaging the print.
Build Plate Material: TPU generally sticks well to glass and PEI surfaces. For better adhesion, apply a thin layer of glue stick or blue painter’s tape.
Bed Temperature: Print bed temperatures of 50-60°C typically work well for flexible filaments, preventing warping and helping keep the base layer in place.
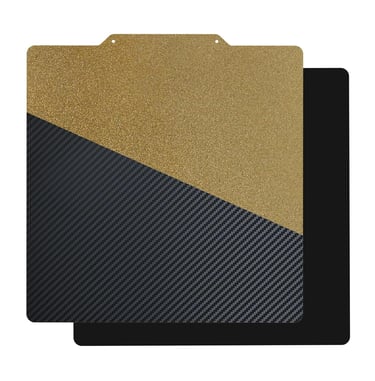
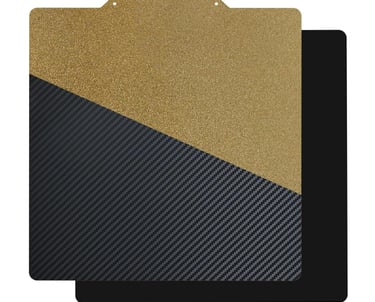
Consider using a FlexPlate for easy removal, as the entire build plate can be bent slightly to pop off your prints without tugging on them directly.
6. Watch Out for Overhangs and Bridges
Flexible filaments can sag under their own weight, so overhangs and bridges can be a little tricky.
Design Considerations: Try to design models with fewer overhangs or support structures if you’re printing in flexible filament.
Cooling Settings: Slightly increase cooling fan speed to help solidify the filament quickly and minimize sagging. However, avoid maximum fan speed as flexible filaments can cool too quickly and reduce layer adhesion.
Fun Fact: If you need flexibility but still want structural stability, consider printing parts in segments and assembling them later!
7. Optimize Slicer Settings for Flexible Filament
Most slicers allow you to create custom profiles. A dedicated flexible filament profile can save you time tweaking settings each time you switch materials.
Layer Height: Flexible filaments generally do well with a layer height of 0.2 mm or lower for better adhesion between layers.
Infill Pattern: Try using infill patterns that provide structure, like grid or gyroid. These patterns support flexible filaments well and can even add a springy effect to your print.
Pro Tip: Experiment with perimeter settings. Fewer perimeters (2-3) often work well for flexible filaments, allowing more flexibility.
In Summary: Patience and Practice Lead to Perfect Flexible Prints
3D printing with flexible filaments might be a bit of a learning curve, but once you get the hang of it, the results are absolutely worth it. By taking it slow, dialing in your settings, and understanding how flexible filaments behave, you’ll be well on your way to producing high-quality, resilient prints that can flex and bounce back. Experiment with different settings, and remember, practice makes perfect!
Happy bending, stretching, and printing!